Pages

Welcome Message

Welcome to my sewing (and other stuff) blog!

Saturday, March 30, 2013

Back From Vacation

There is nothing more invigorating than getting away from dirty snow for a week in the sun! Here are a few photos of my trip to Puerto Vallarta, Mexico with my family.


Beautiful street in Puerto Vallarta with actual blooming flowers!


One of MANY delicious meals


Yum! Fresh coconut and a vendor who was very deft with a machete!


Me on a horse! We took a wonderful  ride across a river, and up and down a trail to see petroglyphs!


According to our guide these petroglyphs  were etched into the rock about 1200 years ago using rattle snake venom!


View from the balcony at our hotel

  We spent quite a bit of time touring different areas of the city. There were many opportunities to shop, but in all of our travels I never saw a place to purchase fabric.
 I am happy to be home and looking forward to sewing. My sewing machines had a nice rest, and so did I!

Friday, March 22, 2013

Travel Tunic

There has been the usual whirlwind as I have finished sewing projects for clients in preparation for a week in the Mexican sun. I did take a few hours to make myself a tunic to take on the trip.
 I had a piece of rayon/spandex knit from Emma One Sock  http://www.emmaonesock.com/fabrics/knitprints.asp  
 There is always a selection of knit prints on this site. I love the rayon knits as they drape beautifully and are really comfortable to wear.

I used McCall's 6571 http://mccallpattern.mccall.com/m6571-products-22762.php?page_id=528&search_control=display&list=search 
 I used view B with the boat neck. The diagonal print on this knit begged to be accentuated, so I cut the top longer, and angled the hem to follow the print.  I will wear this with narrow black capris and a chunky silver necklace.
 I am so happy that I took the time to make one new piece for our trip!

Tuesday, March 19, 2013

A Day of Opposites!

 My resident snow blower/dog feeder/laundry folder/chef/husband is out of town. This meant that I did all of those chores that he so faithfully does, plus I had to shovel the long sidewalk from the street to my sewing studio entrance.  If I had had someone  shoot a video it could have conveyed the rigors of this task. The wind was blowing so hard that as I tossed the snow up on to the 4 1/2 foot bank on the right  strong gusts were filling it back in off of the banks on the left.  Perhaps you have heard about "light, fluffy snow"...well this wasn't it!


  After that effort I came back into my studio and my twin sister called. I was whining a bit about the shoveling, and then I told her that my most dreaded task of the day was that I had to go shopping for a swimsuit!!!!!! She lives in Canada, so she suggested that if I found a suit I should post it on my blog so that she could see it.
 Anyway, my husband and I are blessed to be traveling to Mexico with kids, and grand kids at the end of the week, and grandma will have to don a swimsuit.
 On the rare occasions that I have had to shop for a swim suit I have always wished that there were candle lit fitting rooms. Florescent lights are good for seeing details...and that is why they are hell in a fitting room!
 Anyway, all of this anxiety was pointless as the designers of swim suits have done us a real favor lately by creating suits that cover up things that are best left to the imagination while still looking a bit zippy.

 Zippy is a relative term...I may ask my fifteen year old grand daughter if she thinks her grandma's swimsuit is zippy. She will undoubtedly agree as she is a kind and diplomatic girl.
 Once in my youth I sewed a swimsuit. It was made from a stretch terry sort of fabric, and the teeny top had cups that were extremely hard. When the fabric got wet, and sucked around those cups it was really quite amazing! Nothing about that experience has ever made me feel like tackling another swimsuit.


 I read a blog the other day where a clever young woman had a remote control thingy that allowed her to shoot photos of herself. I feel really lucky that I don't have that technology so that I have an excuse to show my new bathing suit on my dress form.
 My dress form is at least 25 years old and despite that her breasts are at just about the same level as they were when I first bought her.  I cannot not say the same about mine....
 I made myself a "beach burka" cover-up to wear at all times when not is the water...We are staying at an all inclusive resort, and the round-the-clock buffets assure that the suit will be the most flattering on the day of arrival...
 Thoughts of Mexico made today's shoveling bearable as I expect that thoughts of shoveling will make every moment in Mexico precious!

Saturday, March 16, 2013

Perfect Sign

             Here is a sign that I have hanging in my sewing studio.


Were truer words ever said????

Thursday, March 14, 2013

Jacket


 An organization that does work that is very important to me is having a fund raiser on Saturday evening. They put out a call to artists in the community to donate items for the silent auction.
 I had very little time to make something to donate so I used the new Kathrine Tilton  pattern (#5891) to make a jacket.  http://butterick.mccall.com/b5891-products-44968.php?page_id=369

 The front right panel is cut from a wonderful piece of vintage fabric that looks great with the green canvas. I made bound buttonholes to fit the fantastic vintage buttons that match the pink in the vintage fabric.


I used aqua china silk to bind all of the inside jacket seams. The silk is the same color as the aqua in the vintage print fabric on the front of the jacket.
This was a fun jacket to sew!

Tuesday, March 12, 2013

Sewing Library

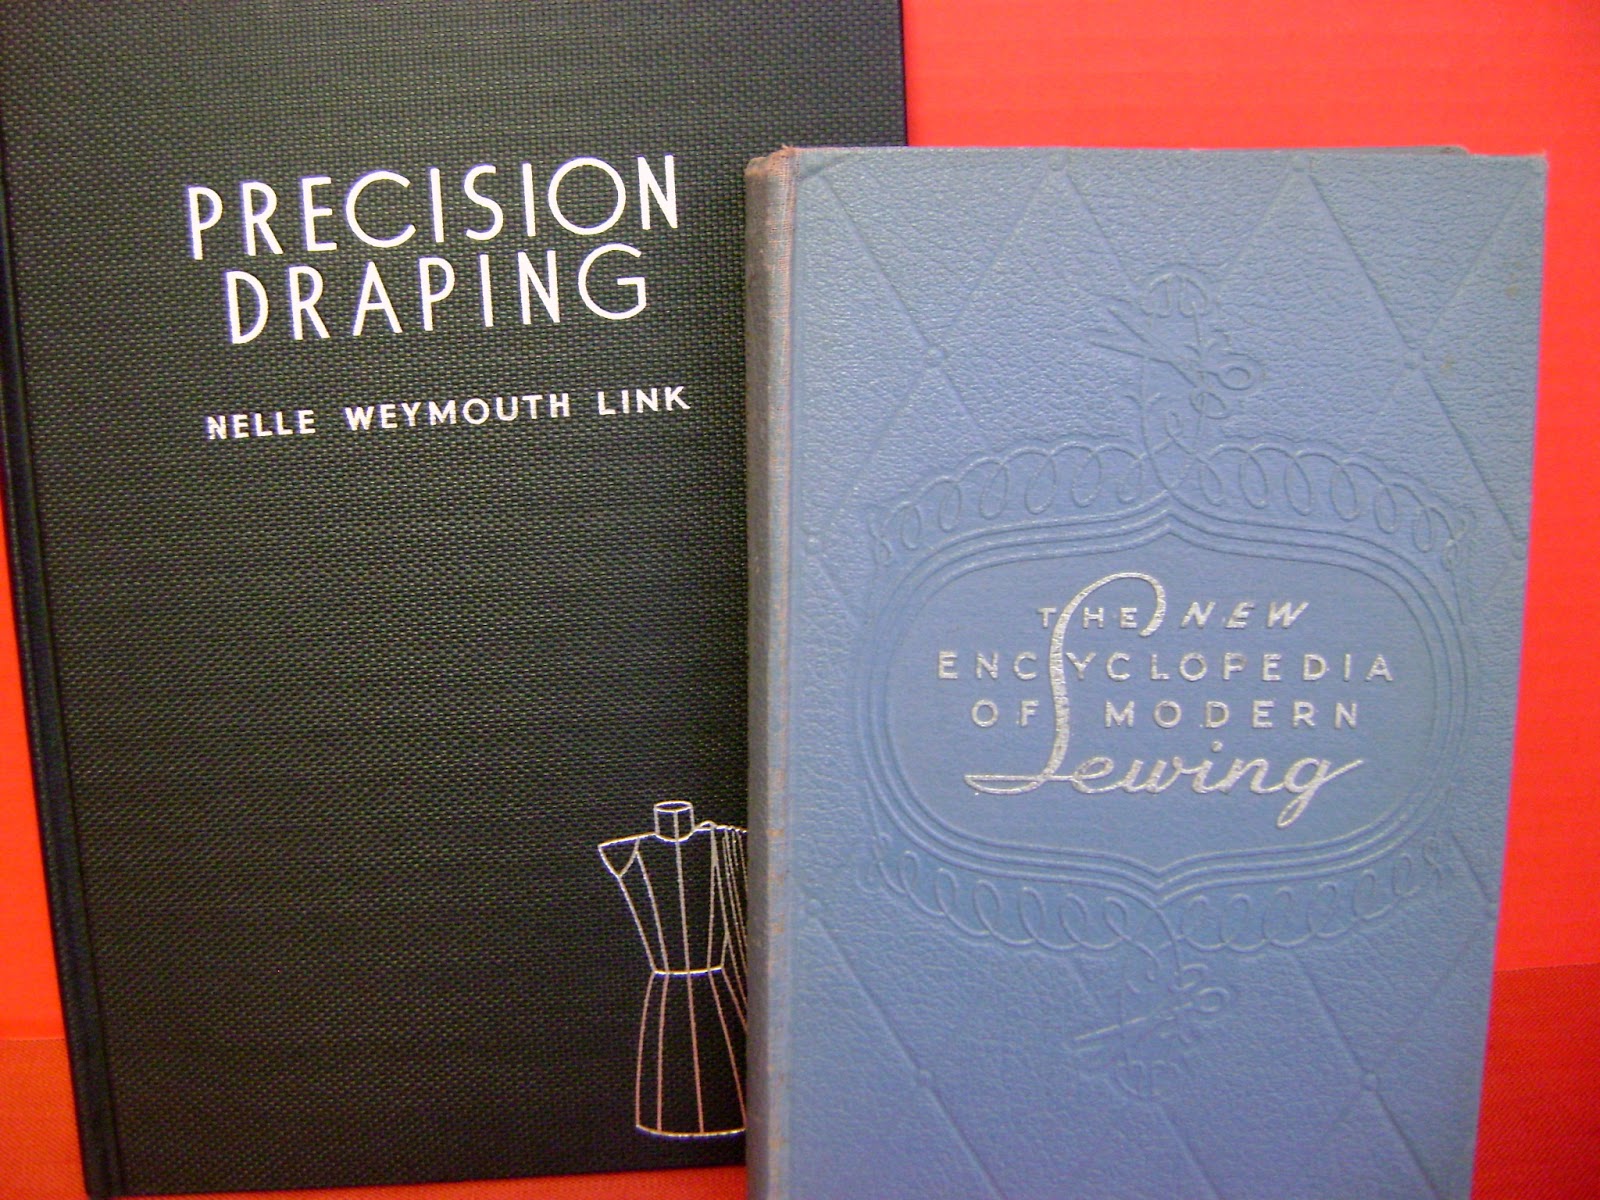
Now that most of us have computers the need for good sewing books has diminished. I have a computer in my sewing room and I use it frequently to access specific sewing information, but there is no denying the value of sewing books.
  I have purchased books at estate sales, or tag sales and used book stores. These older books are very charming, and I have learned some valuable techniques from them.

1930

1949

1948                                      1943


1985
 Decorative Dressmaking by Sue Thompson is one of my favorite sewing books! It is packed with instructions for creating fashion details.

Why is this woman so happy?

Some of the photos are charmingly dated!

Ooooops, Fashion Faux Pas! ala 1985

But, there are numerous pages of  explanations on how to recreate details from era's past.


This book has given me many creative ideas over the years!


This Vogue Sewing Book is from 1980. It is very useful on those occasions when I can't remember how to cover a hook with thread.


Actually it has been a long time since I have felt compelled to cover a hook with thread, but should the occasion arise I will have directions right at hand! It also has many more practical instructions.

I frequently acquaint my students with  www.half.com  This is a web site that consistently has books that I am looking for at unbelievably low prices! It is a good place to start a search for sewing books.

For some of us happiness is a nice little sewing library!


Thursday, March 7, 2013

Little Shoe Pin Cushions

While cleaning out my mother-in-law's house after her passing my husband found his baby shoes. I took a piece of doupioni silk and some polyester fiber fill and stuffed the little shoes to make pin cushions.

 They will look great on my sewing room shelves!


Tuesday, March 5, 2013

Trapunto

Trapunto is a fun technique that I used to make an interesting design even more interesting!
I have a piece of vintage oriental silk woven with  a wonderful "vase" pattern. There is a rose colored "shadow" that gives the print a bit of depth, but I wanted to emphasize the print even more.


I used a technique called trapunto. I pinned a piece of china silk behind the motif and machine sewed most of the way around each of the designs woven in the center of the vase. With a small opening left I used a chop stick to force some polyester fleece into the sewn sections, and then finished sewing the little areas.
 Next I used a lightweight cotton batting a bit larger than the vase and stitched around the outline of the vase. I then trimmed the batting close to the stitching.
 The motifs on the vase now have lots of depth, and the whole motif has a bit of depth with the addition of the batting.
 I used some seed beads for embellishment, and then I added another layer of china silk as a facing  to hide the "innards" of the trapunto technique.


I used my trapunto piece on the front of a doupioni top that fastens with a vintage braided silk button, and a tie at the waist.
Think of using depth and texture to make a garment really unique! Trapunto is one way to achieve this look!

Sunday, March 3, 2013

Invisible Zipper Tutorial

My Pin Pal Chris Lucas http://chrislucas.com.au/  wrote me about her challenge with finding information about insertion of invisible zippers through a waist band, so I have prepared a tutorial that will help her, and others.
 First of all I have to sing the praises of invisible zippers! These zippers are the easiest to install (after the learning curve), and they look far better than any other zipper!
 As I was preparing these photos I remembered that I called a sewing supply company a few years ago and I ordered some invisible zippers from a fellow over the phone. I said "I want four black 22" invisible zippers" to which he responded "how will you know if we sent them when you open the box"?   That still makes me smile!!!


I am going to show the installation of an invisible zipper through a  waist band of a different color. This surely can be tricky, but with these instructions you should be able to master this sewing challenge too!


 I am using fabric scraps to demonstrate. We will pretend that these are full size garment sections. The garment sections are labeled on the wrong side of the fabric.

I always use a lightweight interfacing (tricot iron-on) on the wrong side of the fabric when I am going to install an invisible zipper. This helps tremendously to keep the fabric from puckering. I cut the interfacing at about 1" wide, so that it goes over the seam allowance. In this photo I have applied the wrong colors of interfacing for demonstration purposes, and I have also finished the seam allowances with my serger.  This step will vary depending on the type of fabric you are using and if the garment is to be lined or not.

I have now sewn together the bodice, waistband, and skirt pieces, and pressed the seam allowances toward the waistband.

This shows the right side of the garment. The sharp difference in fabric colors mean that if the zipper installation is not perfect it will be very obvious.


Starting with the zipper stop below the seam allowance at the top of the garment (in most cases 5/8")
I sew the zipper tape to the right side of the fabric. There are many types of machine feet that are designed for this task. I actually use my regular zipper foot and just roll the teeth back a bit so that I can get the stitches very close to the teeth.

I determine how long I want my zipper to be, and sew up to this point which I have marked on the zipper tape with a pencil. I make sure to lock my stitches well at this point.

Now here is the key to making this kind of zipper installation look great! Mark on the zipper tape exactly where the tape crosses the band.


Now zip the zipper and mark on the second side of the zipper exactly across from the first markings.

Pin the second side of the zipper to the other side of the garment having the contrasting band right at the pencil markings. Sew the zipper locking the threads carefully at the bottom of the zipper exactly across from the stitches at the bottom of the first side of the zipper.

The inside of the garment looks like this when both zipper tapes are sewn.

The outside looks like this. Hurray! Now you don't have to avoid the many current sewing patterns that require mastery of this technique!

AND while I was preparing this tutorial I also was preparing a loaf of Sally Lunn Cinnamon Bread. It is a no-knead yeast bread that is really delicious!


Another happy day shuttling between the sewing studio and the kitchen!!!

Saturday, March 2, 2013

Another Artsy Vest

Here is another version of the vest using the same design, but different fabrics.


This vest has the black/red/grey/green vintage oriental fabric combined with heather grey linen.
I used two vintage abalone buttons and a unique red button that I found in my button stash.

I look forward to playing around with these vintage fabrics and buttons soon! Right now I feel that I have earned a bowl of ice cream!!!!

Artsy Vest

I've had a little fun in the past couple of days using "extra" time to make two artsy vests. This one is made from some beautiful black linen and a piece of vintage cotton/wool oriental fabric.


I wanted some texture because these are two smooth fabrics, so using the motif on the vintage fabric I cut three panels, faced them with the linen, and sewed bias ties at the top of each panel.
I then hemmed the body of the vest and sewed ties to the vest that attached to the panels. 


The armhole is flat at the bottom which is a nod to the oriental, and suits the graphic design of the accent fabric.


I used an asymmetrical button with holes large enough to accommodate a bias cord to give a little zap of color and style to the center front of  the vest. These are warm weather pieces. I picture them over a simple short sleeve tee, or a tank.

This was a fun project! I am working on a second vest and will post photos when it is completed.
 I have music playing, tea to sip, and a poodle near me. I doubt that heaven could be better than this!!